How to Install Baseboard Trim Guide for Eastern Washington Homeowners & Contractors
Understanding Baseboard Materials for Eastern Washington Climate
Eastern Washington’s unique climate presents specific challenges for baseboard trim installation. With cold, snowy winters and hot, dry summers, indoor humidity can swing dramatically, causing trim materials to expand and contract. Our region’s temperature extremes make material choice critical for long-lasting results.
MDF vs. Wood vs. Composite Options
Medium-density fiberboard (MDF) remains the most popular choice for paint-grade baseboard in the Spokane area. Pre-primed MDF offers excellent paintability and comes in standard profiles that work well in most homes. However, Eastern Washington’s dry air can cause MDF to shrink slightly, and any moisture exposure can cause swelling. Avoid MDF in basements with moisture history or near exterior doors where snow melt might accumulate.
Finger-jointed pine and fir, common in Pacific Northwest lumber yards, handle our climate better than MDF. These materials resist moisture better and cope with humidity swings more gracefully. Solid wood baseboards – clear pine, Douglas fir, or poplar – offer the best performance for stain-grade applications and premium installations, though they require more skill to install properly.
For problem areas like unfinished basements or mudrooms, PVC composite baseboards eliminate moisture concerns entirely. While more expensive and requiring specific painting techniques, they won’t rot or swell in damp conditions common in older Eastern Washington homes.
Sizing Your Baseboard for Regional Architecture
Most homes in our area use 3¼” to 3½” tall baseboard with 9/16″ thickness. Ranch-style homes from the 1960s-1990s often have thinner 2¼” trim, which looks dated by current standards. Homes with 9-foot or taller ceilings benefit from 4½” to 5½” baseboard, sometimes with additional shoe molding or cap details.
Consider your home’s architectural style when selecting profiles. Craftsman-style homes common in older Spokane neighborhoods call for wider, more substantial trim. Modern farmhouses popular in rural Colville and Kettle Falls areas work well with clean-lined profiles in the 4″ range.
Essential Tools and Supplies for Professional Results
Success with baseboard installation depends heavily on having the right tools and using quality materials suited to our regional conditions.
Critical Tools for Accurate Installation
A quality miter saw with an 80-100 tooth fine blade is essential for clean cuts, especially when working with MDF. Cheap blades create tear-out that shows even after painting. A reliable stud finder helps locate solid nailing points – critical in older homes where stud spacing may be irregular.
An 18-gauge brad nailer with 2-inch nails provides the holding power needed for our climate’s seasonal movement. Hand-nailing works but takes significantly longer and increases the risk of splits. A coping saw or oscillating multi-tool enables proper inside corner joints that stay tight even as materials move.
Don’t overlook measuring and layout tools. A quality tape measure, speed square, and pencil for marking prevent costly mistakes. Shims become essential when dealing with uneven floors common in older Eastern Washington homes.
Selecting the Right Fasteners and Finishes
Use 18-gauge brad nails, 2 inches long, to reach studs through drywall. Shorter nails only grab drywall and will pull loose over time. Space nails every 12-16 inches, hitting studs whenever possible.
Choose paintable acrylic-latex caulk specifically designed for trim work. Our dry winter air can crack inferior caulks, creating visible gaps. High-quality flexible caulk costs more initially but prevents callback problems.
For paint, use a premium trim enamel in semi-gloss or satin finish. These harder finishes resist scuffs from vacuum cleaners and mop buckets while providing easy cleaning – important in mudroom and kitchen areas where winter boots and cooking spills are common.
Step-by-Step Installation Process
Proper installation sequence prevents common problems and ensures professional-looking results that will last through Eastern Washington’s challenging seasonal changes.
Planning and Measuring
Start by creating a detailed floor plan showing each wall’s length and any obstacles like heat registers or built-ins. Measure twice and add 1/16″ to each piece for tight fits – our dry air will shrink materials slightly over time.
Plan your cuts to minimize waste. Standard lumber comes in 8, 12, and 16-foot lengths. A typical 12×12 room needs about 48 linear feet of baseboard, which fits efficiently into four 12-foot pieces with minimal waste.
Mark stud locations on the wall using a stud finder. Older homes may have irregular stud spacing, so don’t assume 16-inch centers. Mark locations lightly with pencil above where the baseboard will sit.
Cutting and Fitting Techniques

Cut all straight pieces first, labeling each for its intended location. Cut outside miters next, testing fit before moving to inside corners. For inside corners, use the coping technique rather than mitered joints – this accommodates wall irregularities and seasonal movement better.
To cope an inside corner, cut one piece square to the wall. Cut the second piece at 45 degrees, then use a coping saw to cut along the profile line, creating a custom fit against the first piece’s profile. This joint stays tight even as materials move.
For long walls requiring joints, use scarf joints rather than butt joints. Cut both pieces at opposing 45-degree angles and overlap them at a stud location. This hides any gaps that develop from shrinkage.
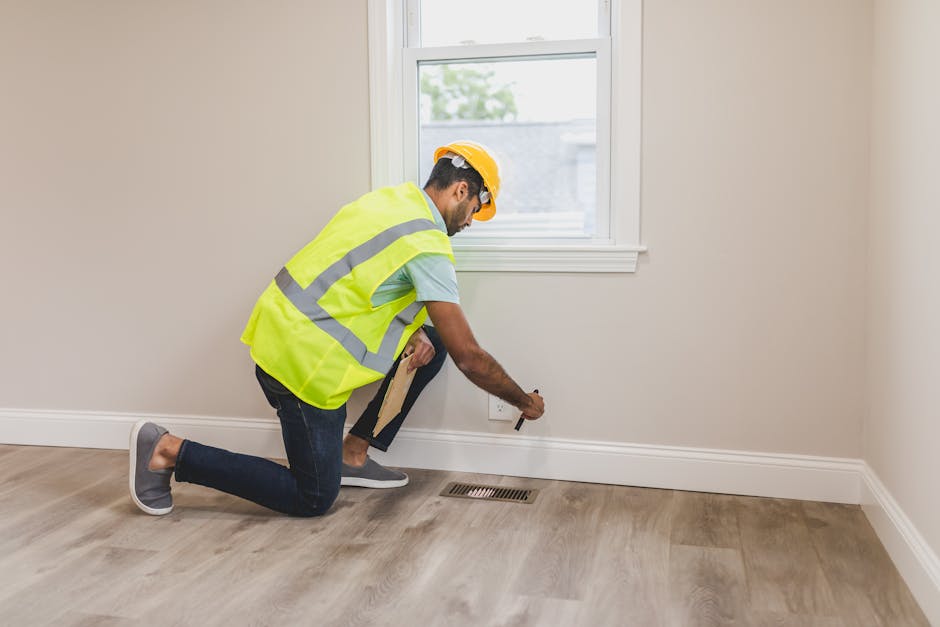
Installation and Securing
Install the longest, most visible pieces first. Nail into studs every 12-16 inches, angling nails slightly downward for better holding power. Don’t drive nails completely flush – leave heads slightly proud for easy filling later.
Deal with uneven floors by scribing the baseboard to follow floor contours, or use shims behind the board to maintain straight sight lines. In older homes around Colville and Kettle Falls, floors often settle unevenly, making this step critical for professional results.
Check each piece for plumb and straight before final nailing. Use a level on longer pieces to ensure they don’t follow wavy walls. Sometimes splitting the difference between wall and floor irregularities creates the best visual result.
Finishing and Maintenance for Long-Term Performance
Proper finishing protects your investment and ensures your baseboard trim looks professional for years despite Eastern Washington’s challenging climate conditions.
Filling and Sanding
Fill all nail holes with lightweight spackle or wood filler, slightly overfilling each hole. Our dry air causes fillers to shrink, so generous application prevents visible dimples after painting. Allow complete drying – rushing this step shows in the final finish.
Sand all filled areas with 150-180 grit sandpaper until perfectly smooth. Check with your hand rather than just your eyes – any roughness will show through paint under certain lighting conditions.
Caulking and Final Paint
Apply paintable caulk only where trim meets walls, never along the floor line. Caulking to the floor traps dirt and looks unprofessional. Use a wet finger or caulk tool to smooth bead immediately after application.
Allow caulk to cure completely before painting – usually 24 hours in our dry climate. Apply primer if you’re changing paint colors significantly, then finish with two thin coats of quality trim enamel rather than one thick coat.
Seasonal Maintenance Tips
Expect minor gaps to appear at joints during dry winter months when indoor humidity drops. Small gaps are normal and usually close up when humidity returns in spring. Only re-caulk gaps wider than 1/8 inch.
Touch up scuffs and nail pops promptly to prevent moisture infiltration in humid areas like basements and bathrooms. Keep some matching paint for quick touch-ups – it’s much easier than repainting entire rooms.
Common Mistakes and Professional Solutions
Learning from typical DIY errors can save time, materials, and frustration while delivering results that match professional installations.
Measurement and Cutting Errors
The most expensive mistakes involve incorrect measurements and cuts. Always measure each wall individually rather than assuming symmetry – older homes rarely have perfectly square rooms. Cut pieces slightly long and test-fit before final trimming.
Many DIYers struggle with outside corners, often cutting angles incorrectly or failing to account for wall irregularities. Practice on scrap pieces first, and remember that walls may not be exactly 90 degrees. Adjust miter angles slightly as needed for tight fits.
Installation Problems
Nailing only into drywall rather than studs causes boards to pull away from walls over time. Our region’s temperature swings put extra stress on fastenings, making solid connections essential. If you must nail between studs, use construction adhesive as backup.
Poor caulking technique creates more problems than it solves. Too much caulk looks sloppy and collects dirt. Too little leaves visible gaps. Practice on scrap materials to develop a steady technique before working on visible areas.
When dealing with Eastern Washington’s older housing stock around Spokane and smaller towns, expect uneven floors and wavy walls. Don’t fight these conditions – work with them using scribing and shimming techniques to create straight sight lines while accommodating structural irregularities.
Whether you’re tackling a single room or planning a whole-house baseboard installation, having the right materials and expert advice makes all the difference. We stock a complete selection of baseboard trim, tools, and finishing supplies at our Airway Heights, Colville, and Kettle Falls locations. Our experienced team understands Eastern Washington’s unique building challenges and can help you select the perfect materials for your project. Visit our online shop at https://bldrsupply.epicor-inet.com/departments to browse our current inventory, or stop by any of our three locations for hands-on assistance with your baseboard trim installation project.